In today’s fast-evolving world of medical imaging, mobility and precision have become essential. Traditional ultrasound machines; once limited to stationary or cart-based setups, are being replaced by handheld ultrasound systems like Sono Mobile™, which deliver real-time, high-quality imaging directly at the patient’s bedside.
Unlike bulky traditional units that require dedicated rooms and fixed power sources, mobile ultrasound devices are compact, wireless, and app-integrated, offering exceptional convenience for practitioners and students alike. Whether you’re a nursing student learning basic scanning, a medical intern mastering obstetric imaging, or a pregnant person curious about how ultrasounds work, understanding how to use a handheld ultrasound is a vital step toward modern diagnostic care.
This comprehensive guide will help you navigate everything, from setting up your device and preparing the patient, to probe handling, image interpretation, and maintenance tips, so you can perform effective and confident scans every time.
Understanding the Handheld Ultrasound System
What Is a Handheld Ultrasound?
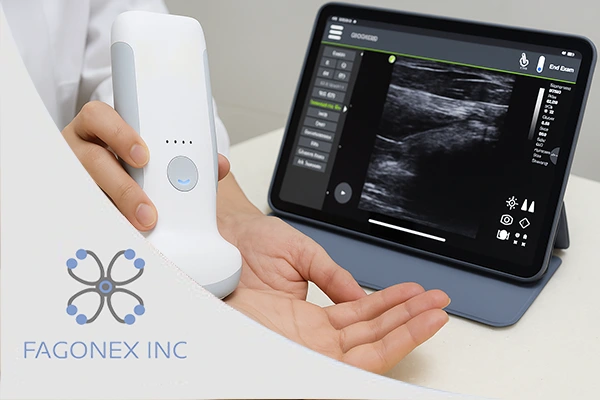
A handheld ultrasound, often referred to as a mobile ultrasound or pocket ultrasound, is a compact imaging tool that connects wirelessly to a smartphone, tablet or laptop. Devices like Sono Mobile™ from Fagonex are specifically designed to deliver hospital-grade imaging in a fraction of the size and cost of conventional machines.
These systems combine advanced transducer technology with mobile size image processing and AI-assisted enhancement to help clinicians obtain clear diagnostic images in seconds.
How It Differs from Traditional Systems
Feature | Traditional Ultrasound | Portable (Laptop-Style) | Handheld (Sono Mobile™) |
Size & Mobility | Large, cart-mounted | Medium-sized, needs power outlet | Fits in a pocket |
Power Supply | Wall-powered | Plug-in or battery-based | Fully battery-powered |
Image Quality | Excellent | High | High |
Operation | Complex setup | Moderate setup | Instant startup via app |
Applications | Hospital imaging rooms | Mobile clinics | Bedside, emergency, field, or home use |
Handheld ultrasound systems represent the future of diagnostic imaging, combining flexibility, affordability, and accessibility for both professionals and learners.
Guide to Using Handheld Ultrasound

To effectively use a handheld ultrasound device, it’s important to understand both the technical setup and the clinical workflow. Below is a detailed, step-by-step guide to help practitioners and doctors begin scanning confidently and correctly.
Step 1: Setting Up Your Device Properly
Before your first scan, ensure your Sono Mobile™ or equivalent handheld ultrasound device is ready to operate.
a. Power and Connectivity
- Fully charge the transducer using the supplied cable or charging dock.
- Turn on the probe; most modern handheld systems automatically connect via Wi-Fi or Bluetooth to your mobile app.
- Launch the dedicated scanning app (such as Sono Mobile™ App) on your smartphone, tablet or laptop.
b. Software Setup
- Update to the latest firmware for improved performance and compatibility.
- Choose your scan mode: B-Mode, Color Doppler, or M-Mode, depending on your imaging need.
- For pregnancy ultrasound or trimester scans, select the OB/GYN preset, which automatically optimizes frequency and depth, other specialities presets are available on the App menu.
c. Image Calibration
Before scanning, place the probe on a phantom or your palm to check for correct orientation and image stability. Ensure brightness, gain, and depth are adjusted for optimal image quality, and save your own preset for next time.
Step 2: Preparing the Patient and Environment
a. Patient Positioning
For clear imaging, position the patient comfortably according to the target anatomy:
- Abdominal (Pregnancy Ultrasound): Supine position, slight head elevation.
- Cardiac or Vascular: Slight left lateral decubitus.
- Pelvic or Bladder: Supine with a full bladder.
Ensure privacy, warmth, and proper draping to make the patient feel relaxed.
b. Apply Ultrasound Gel
Apply a generous amount of ultrasound gel to eliminate air between the probe and the skin. Air interferes with sound wave transmission and can cause image artifacts. Use medical-grade gel for optimal conduction.
c. Lighting and Noise Control
Although handheld ultrasound is designed for versatility, ensure a well-lit and quiet environment when possible, especially during pregnancy ultrasound sessions where subtle fetal structures need clear visibility.
Step 3: Probe Handling and Basic Scanning Techniques
Mastering probe handling is key to producing diagnostic-quality images.
a. Understanding Probe Orientation
Every probe has a marker dot or ridge. Always align this marker to the correct anatomical plane:
- For longitudinal scans, the marker should face the patient’s head.
- For transverse scans, it should face the patient’s right side.
This ensures standardized orientation for interpretation and documentation.
b. Basic Movements
- Sliding: Move the probe linearly to explore adjacent anatomy.
- Rocking: Tilt slightly to focus on deeper or superficial structures.
- Rotating: Turn the probe 90° to switch between longitudinal and transverse views.
- Fanning: Pivot from a fixed point to examine the structure’s full dimension.
c. Stability and Pressure
Apply gentle, steady pressure. Too much can distort organs, while too little may degrade image quality.
For trimester scans, maintain smooth, slow movements to avoid disturbing fetal position or comfort.
Step 4: Capturing and Interpreting Images

a. Real-Time Visualization
The Sono Mobile™ App displays the ultrasound image instantly on your device. Adjust gain, depth, and contrast as needed. Use the freeze function to pause and review frames.
b. Key Image Landmarks
- First Trimester Pregnancy: Gestational sac, yolk sac, fetal pole.
- Second Trimester: Fetal anatomy (head, limbs, heart motion, placenta).
- Third Trimester: Fetal position, amniotic fluid, growth parameters.
c. Image Capture and Storage
- Capture still images or video loops directly from the app.
- Use cloud-based storage for easy access and secure sharing with healthcare teams.
- Label images with patient ID, date, and scan type for proper documentation.
d. Basic Interpretation Tips
- Brightness/Gain: Overexposed images hide fine details; underexposed ones lack clarity.
- Depth: Adjust so the target organ occupies two-thirds of the screen.
- Focal Zone: Position it at or just below the structure of interest.
With consistent practice, interpretation becomes intuitive; allowing you to recognize anatomy, pathologies, and fetal development milestones confidently.
Step 5: Maintenance and Device Care
To ensure your handheld ultrasound functions optimally and lasts for years, proper maintenance is crucial.
a. Cleaning Protocol
After every scan:
- Disconnect the probe from the app.
- Wipe the probe surface with a lint-free cloth.
- Disinfect using approved medical-grade wipes (avoid alcohol-based agents unless recommended).
- Never submerge the probe in liquid.
b. Charging and Storage
- Fully recharge after every shift.
- Store in a dry, dust-free case away from direct sunlight.
- For long-term storage, remove from the charging dock.
c. Software and Firmware Updates
Regularly check for updates through your device’s app settings. These updates often enhance imaging algorithms, connectivity, and data encryption for patient safety.
d. Preventive Care
Schedule periodic calibration checks with your manufacturer or authorized distributor (such as Fagonex). Preventive maintenance ensures compliance with health standards and reduces downtime.
Common Mistakes to Avoid for New Users
Even with intuitive devices like Sono Mobile™, beginners often make a few avoidable mistakes. Awareness of these can greatly improve your learning curve:
- Skipping Gel or Using Too Little: Using insufficient ultrasound gel or skipping it entirely leads to poor acoustic contact between the probe and the skin. This creates air gaps, which significantly degrade image quality, making anatomical structures appear blurry or distorted. Always apply a generous layer of gel to ensure smooth scanning and accurate diagnosis.
- Incorrect Probe Orientation: Incorrectly aligning the probe can cause confusion in image interpretation. Orientation markers are essential to understand which direction corresponds to the patient’s anatomy. Misalignment can lead to reversed or misleading images, resulting in diagnostic errors. Always ensure the probe’s marker matches the orientation standard for each type of scan.
- Holding the Probe Too Tightly: Gripping the probe too firmly can distort soft tissue or compress organs, giving false anatomical appearances. Excessive tension also strains the wrist and forearm muscles, causing fatigue during longer scanning sessions. Maintain a relaxed, controlled grip and use light pressure to optimize image quality while preserving ergonomics.
- Ignoring Presets: Ultrasound machines provide preset modes tailored for different organs or exam types (e.g., cardiac, abdominal, vascular). Ignoring these can result in suboptimal images because settings like frequency, gain, and depth may not match the target anatomy. Always select the appropriate preset to ensure clarity, efficiency, and accurate measurements.
- Overlooking Image Gain/Depth: Failing to adjust gain or depth can hide crucial anatomical details. High gain may wash out structures, while low gain can obscure them. Incorrect depth settings may cut off important areas or include unnecessary tissue. Proper adjustment ensures optimal visualization of the organ or vessel of interest, enhancing diagnostic confidence.
- Failing to Save Properly: Neglecting to save, label, and archive scans can lead to lost patient records or difficulty in follow-up. Proper documentation ensures reproducibility, legal compliance, and effective communication with other clinicians. Always save images with clear patient identifiers and exam details to maintain organized and professional records.
- Improper Cleaning: Cleaning probes with harsh chemicals, soaking, or using abrasive materials can damage transducers, degrade image quality, or shorten the probe’s lifespan. Use manufacturer-approved disinfectants and cleaning protocols. Gentle wiping and proper storage help maintain probe functionality and patient safety, ensuring consistent performance over time.
- Skipping Training: Skipping formal training, workshops, or video tutorials can limit proficiency. Ultrasound imaging requires hands-on practice and technique refinement to interpret images correctly. Regular learning helps clinicians understand probe manipulation, machine settings, and pathology recognition, improving diagnostic accuracy and confidence at the bedside.
Training Resources and Skill Development
Fagonex offers educational support through online tutorials and live workshops designed for:
- Medical students seeking ultrasound fundamentals.
- Nurses and midwives learning bedside pregnancy assessments.
- Clinicians integrating handheld imaging into daily practice.
These resources focus on practical scanning protocols, real-world obstetric cases, and trimester-based ultrasound training, empowering users to gain both confidence and accuracy.
Continuous learning ensures that you can use devices like Sono Mobile™ not just for observation, but for meaningful clinical decision-making.
Real-World Applications of Handheld Ultrasound

Handheld ultrasound systems have revolutionized various medical fields, especially point-of-care ultrasound (POCUS) and obstetric care.
Pregnancy Ultrasound
Expecting mothers can benefit from quick, on-the-spot fetal assessments throughout pregnancy. From confirming early viability in the first trimester to monitoring growth in later stages, handheld ultrasound makes these check-ups accessible even outside large hospitals.
Emergency and ICU
Physicians can instantly visualize cardiac motion, detect internal bleeding, or assess fluid status without waiting for large equipment.
Nursing and Bedside Care
Nurses can monitor vascular access, guide IV insertions, or perform bladder scans efficiently; saving time and improving patient comfort.
Rural and Remote Care
Handheld ultrasound bridges the healthcare gap by enabling diagnostics in underserved regions without the need for full-size machines.
Medical Education
Students and interns can practice anatomy and scanning skills in real-time, enhancing both theoretical and clinical understanding.
Conclusion
The rise of handheld ultrasound technology, powered by innovations like Sono Mobile™, has transformed the way clinicians, nurses, and even expectant parents approach diagnostic imaging. Compact, wireless, and powerful, these devices bring imaging to the point of care; delivering speed, accuracy, and accessibility in a single solution.
By following this step-by-step guide; from setup and patient preparation to probe handling, image interpretation, and maintenance, you can confidently perform scans with professional-level precision.
Whether you’re tracking a pregnancy, studying ultrasound anatomy, or improving bedside diagnostics, Sono Mobile™ by Fagonex makes it possible to bring imaging directly into your hands, literally redefining modern ultrasound practice.